How to save with Mai Pantry
Last updated · For the iPhone app, version 1.2.0
Mai Pantry helps you spend less on groceries. It shows this week's prices and specials at the supermarkets near you, totals your shopping list and works out the cheapest way to buy it. This guide shows you how, one task at a time.
Quick start
- Set your home location. When you first open the app, tap Set my location and enter your suburb, or just pick your state. You can change it later in Settings → Home location.
- Find a product. Tap Search and type what you need, such as “milk”.
- Add it to a list. Tap + on the result. If you have more than one list, pick which one.
- See the cheapest way to buy it. Tap Trip. It prices your list at the stores near you and shows what each way of shopping saves.
Find the cheapest price for a product
- Tap Search and type the product. Each result shows its price at each store, cheapest first.
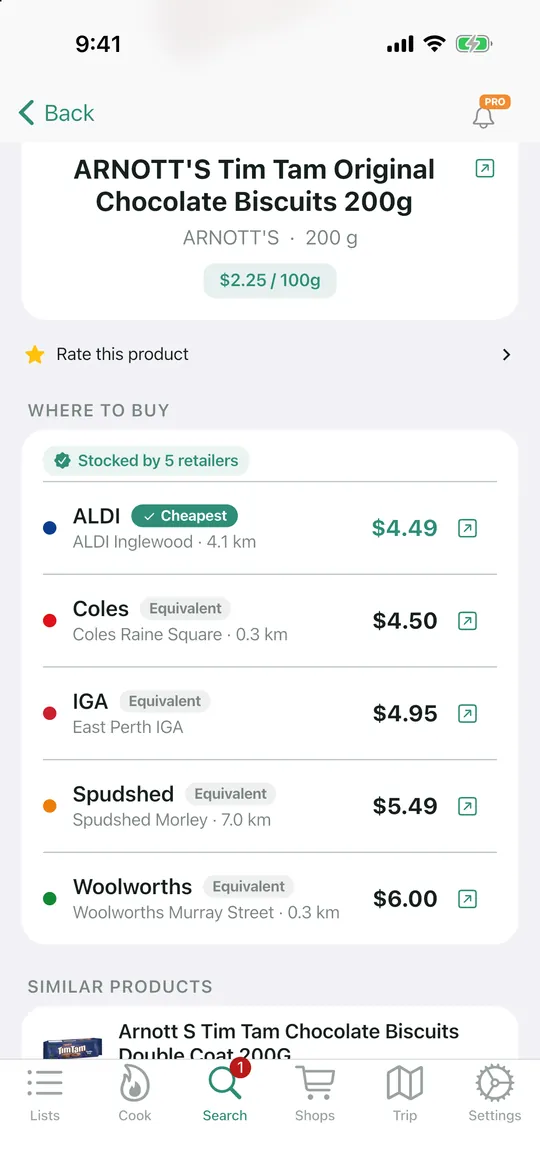
- Tap a product to open it. Under Where to buy, the lowest price is marked Cheapest. A store with a special shows On sale.
- Check the unit price under the name, such as $2.25 / 100g. It makes different sizes easy to compare.
- Scroll to Similar products for other brands and sizes, each with its best price. If you opened the product from your list, tap Swap to change the item.
Catch this week's best specials
- Tap Search, then Deals.
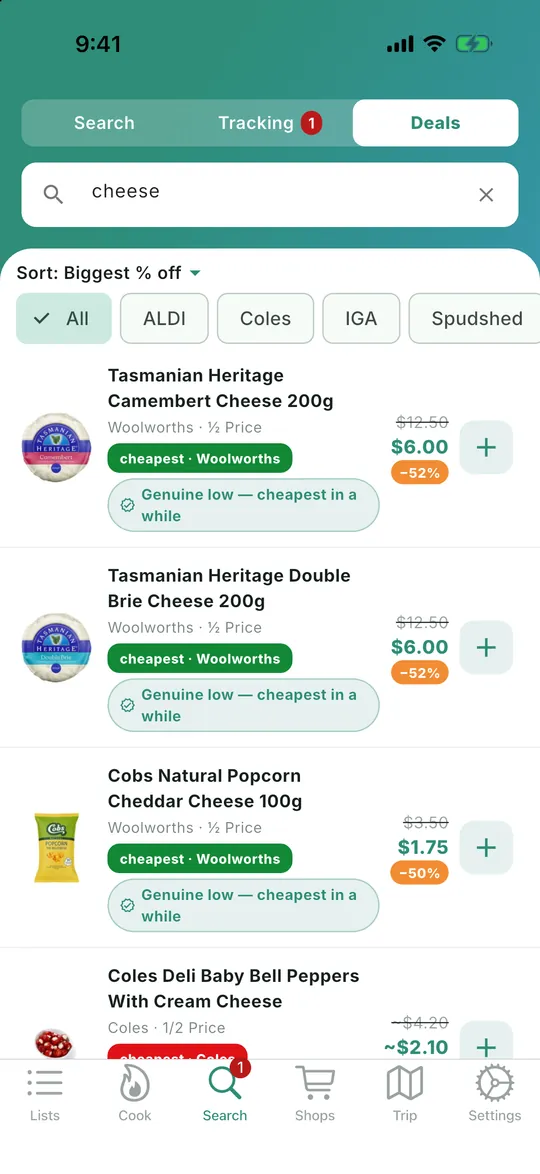
- Sort by Biggest % off to see the deepest discounts first. Tap a store's chip to see just that store, or type in Search deals… to find something.
- Read the pill on each special. Every special in Deals has been checked against the product's recent prices. The pill says whether it's a Real saving or the cheapest it's been in a while.
- Tap + to add a special to a list.
Build a list that totals itself
- Tap Lists, then + and New list. To paste a whole list at once, choose New list from text.
- Open the list and tap Add item. Or tap Quick add and type or paste several items, one per line.
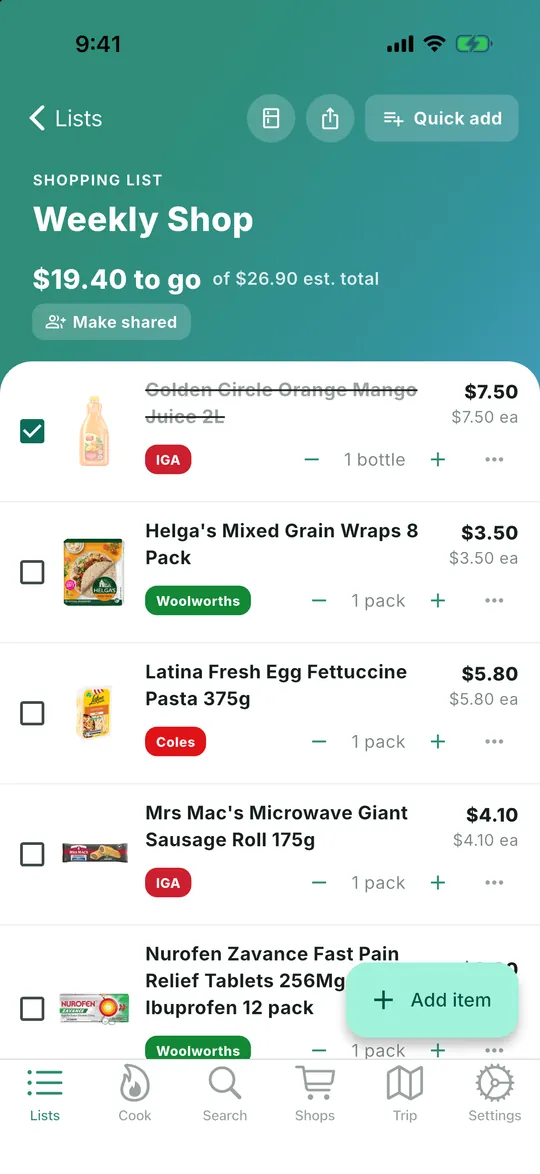
- Each item shows its current best price, and the list shows an estimated total. When a price changes, a small ▼ or ▲ shows the new price.
- Tick items off as you shop. The total then shows how much is left to go.
Work out the cheapest way to buy your list
- Tap Trip. Tap the lists button at the top to choose which lists to include.
- Choose where you start: Home or Current location.
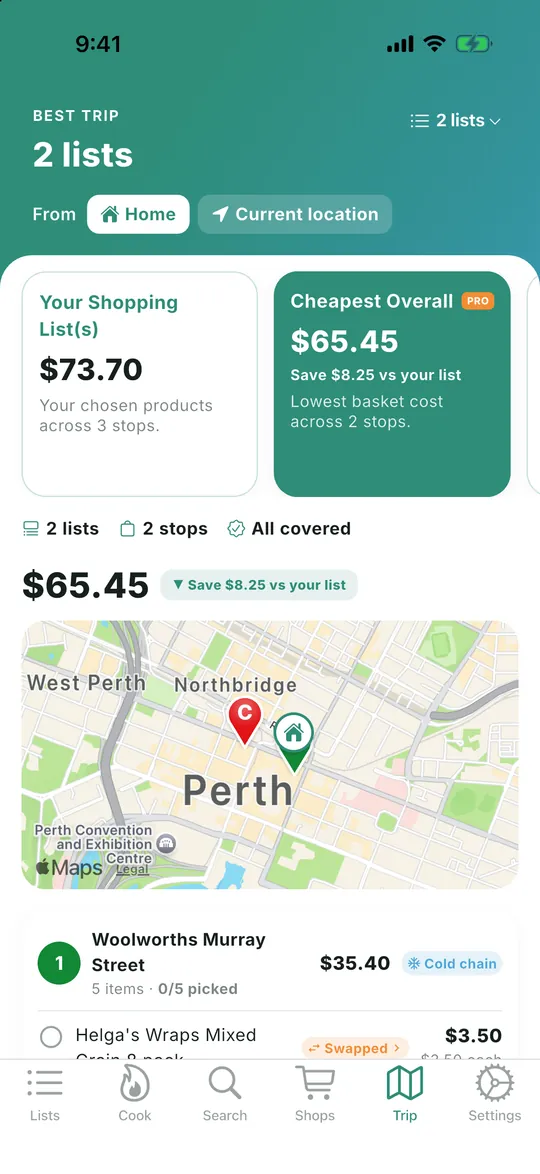
- Swipe through the options. Each shows its total and what it saves against your list. One Stop buys everything at one store. Nearby Best Value uses the closest stores that have it all. Cheapest Overall splits your list across stores for the lowest total.
- Tap an option to see its stops on the map and what to buy at each. Tap Open in Maps for directions.
Cheapest Overall is a Pro option. On the free plan you can use it once a month: tap it and choose Use free trip.
Plan meals into a priced list
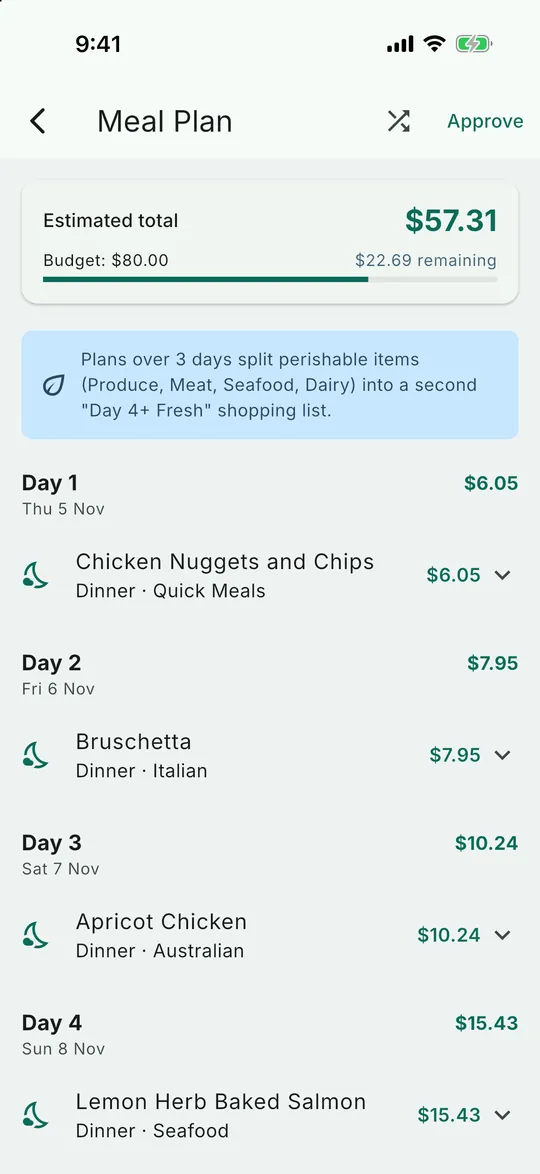
- Tap Cook, then Plan, then Create meal plan.
- Choose the start date, how many days and which meals to cover. Set a budget if you like, and choose whether to prioritise savings or favourites.
- Tap Generate plan. You'll see each day's meals with prices, and an estimated total against your budget.
- Tap Approve & add to list. The ingredients become a shopping list, with what's already in your pantry taken off.
Plans use the recipes in Cook → Menus. Plans over 3 days put fresh food on a second “Day 4+ Fresh” list. On the free plan, your monthly plan is used when you tap Generate plan.
Cook from what you have
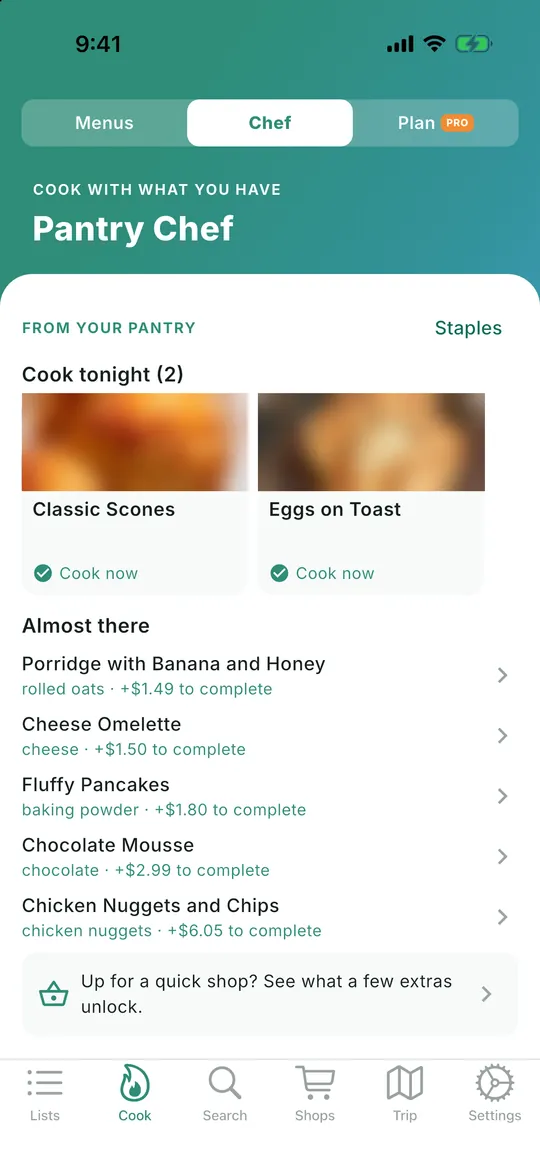
- Add what's in your cupboard. Tap Lists, then Pantry, then +. Search for an item and tap Add to Pantry.
- Tap Cook, then Chef. Tap the card and choose Use free unlock. Pantry Chef then stays open for 24 hours.
- Cook tonight lists meals you can make now. Almost there shows meals that are an item or two short, and what they'd cost to finish.
- Tap Up for a quick shop? Set a budget and how far you'll go, tap Find my quick shop, then add the extras to a list.
Track a price
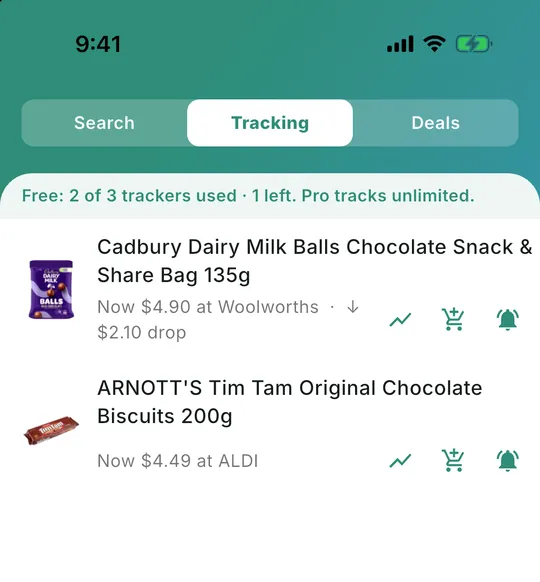
- Search for a product and tap the bell on its row.
- Find your tracked products under Search → Tracking.
- When a tracked price drops, the Search tab shows a badge. If you allow notifications, you'll also get a “Price drop” alert.
- Tap the chart button to open the product and see its price history: the last 30 days free, or up to 12 months with Pro.
Shop together with shared lists
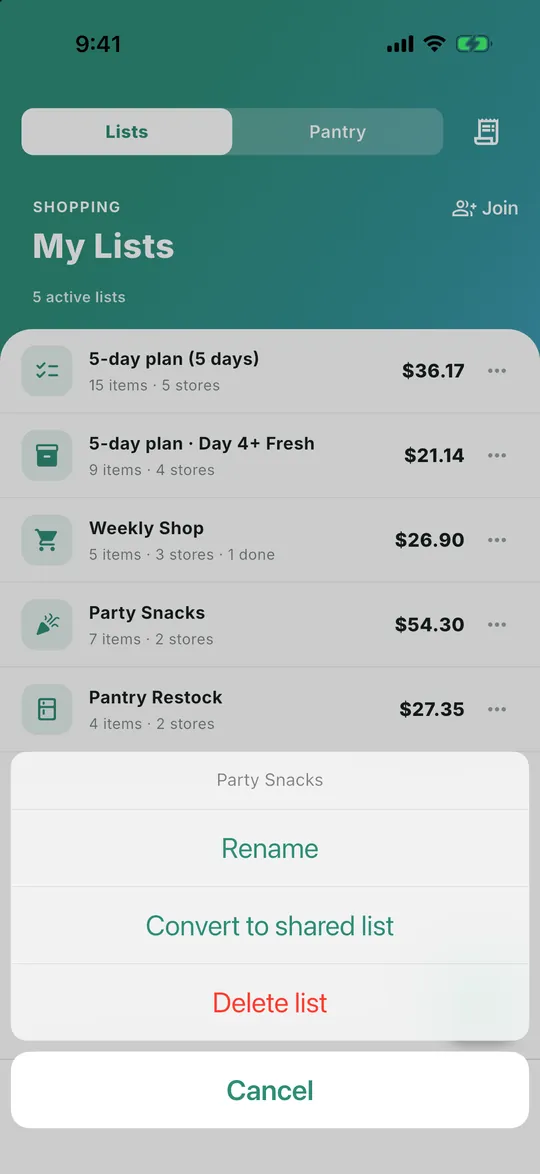
- On Lists, tap ··· next to a list and choose Convert to shared list. Or tap + and New shared list.
- Choose who can add items: Only me or Members can add. Everyone can tick items off.
- Send the invite with Copy Code or Copy Share Link. Up to 5 people can be on a list, including you. Changes sync within seconds.
- To join someone's list, tap Join on Lists. Enter the invite code and your name, then tap Join List.
On the free plan you get one shared list a month, counting lists you create or join, and it lasts 7 days. Pro shared lists don't expire while they're in use. Joining a Pro member's list is free.
Use your own IGA
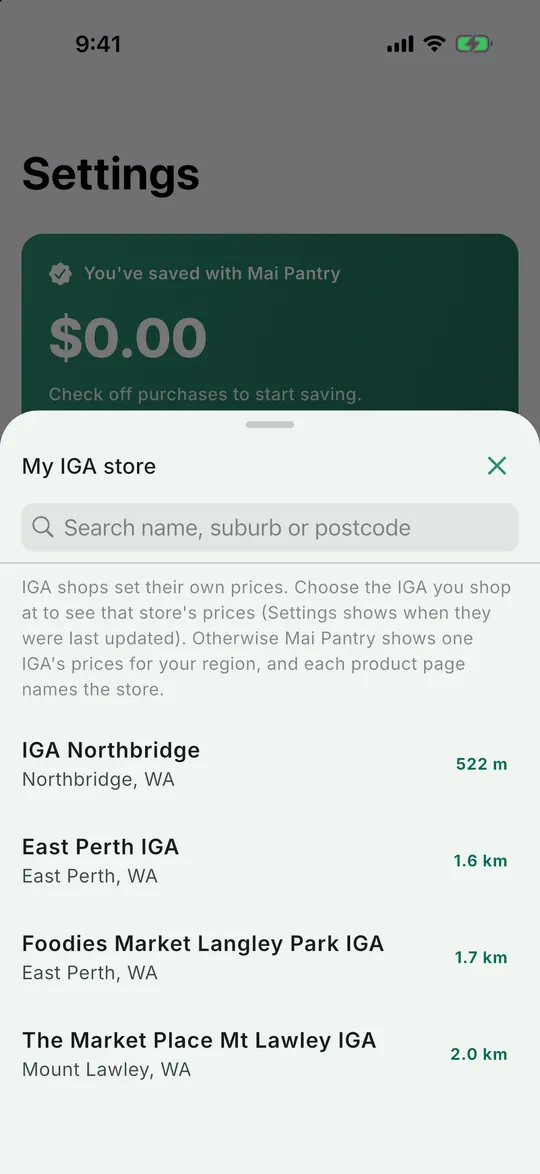
- Tap Settings, then My IGA store.
- Search by name, suburb or postcode, or pick an IGA near you.
- Tap your store. Mai Pantry then shows that store's own prices for IGA. Settings shows when they were last updated.
- Anything your store doesn't list shows your region's IGA price. To switch back, choose No preferred store.
If your store's prices aren't ready yet, you'll see your region's IGA prices until they are.
About the prices
- Prices are updated every week. They come from publicly available information.
- Mai Pantry covers Coles, Woolworths, ALDI and IGA, plus Spudshed in Western Australia.
- Your home location sets your price region, because WA prices differ from the rest of Australia. It also decides which stores count as near you.
- IGA shops set their own prices. Unless you choose your own IGA, Mai Pantry shows one IGA's prices for your region, and the product page names the store.
- Prices in store can change at any time. Always check the shelf price before you buy.
Mai Pantry is independent and not affiliated with any retailer.
Free and Pro
The core of Mai Pantry is free, with no account needed. Mai Pantry Pro removes the limits.
| Feature | Free | Pro |
|---|---|---|
| Prices, search, specials and lists | Yes | Yes |
| Trip: One Stop and Nearby Best Value | Yes | Yes |
| Trip: Cheapest Overall | Once a month | Unlimited |
| Meal plans | One a month | Unlimited |
| Recipe imports from the web | One a month | Unlimited |
| Pantry Chef | 24 hours, once a month | Unlimited |
| Price tracking | 3 products, 30 days of history | Unlimited, up to 12 months of history |
| Shared lists | One a month, lasting 7 days | No monthly limit, no expiry while in use |
| Per-each sort and spending insights | No | Yes |
See Pricing for what Pro costs.
Need a hand?
Start saving on your next shop.
Get Mai Pantry free on iPhone